The Kintec Orthotic Process
It’s magic! A patient comes in for their orthotic assessment, and two weeks later, their perfectly-fitting custom orthotics are ready.
Have you ever wondered how we make our custom orthotics? It’s a pretty interesting process.
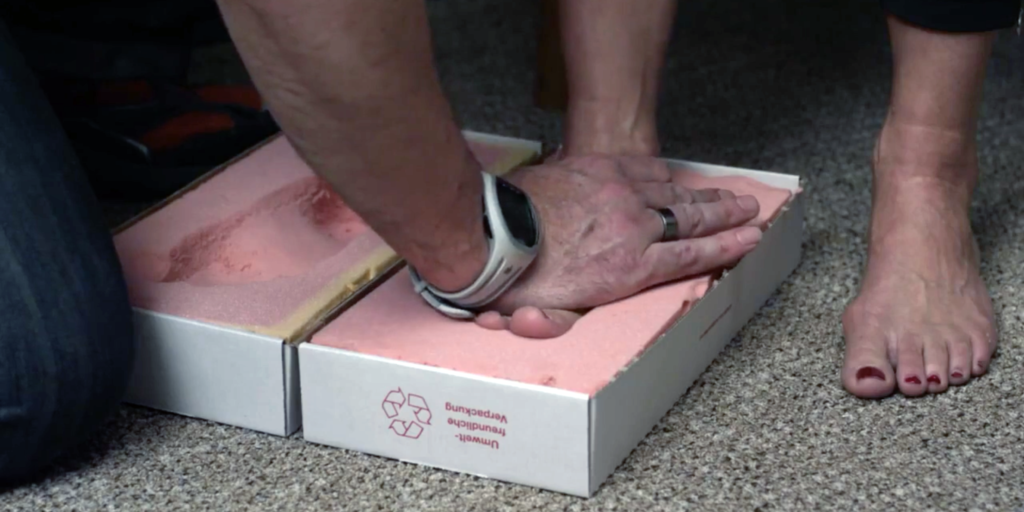
Step 1: Casting
At your orthotic assessment, we take a 3D cast of your feet in their neutral position.
We can cast in a variety of methods, including a plaster-slipper cast, a foam impression box, and a digital scan. Nowadays, we do most of our casting digitally.
Regardless of the casting method, the patient is always non-weight-bearing, or semi-weight bearing and the pedorthist is maintaining the neutral position of the subtalar joint.
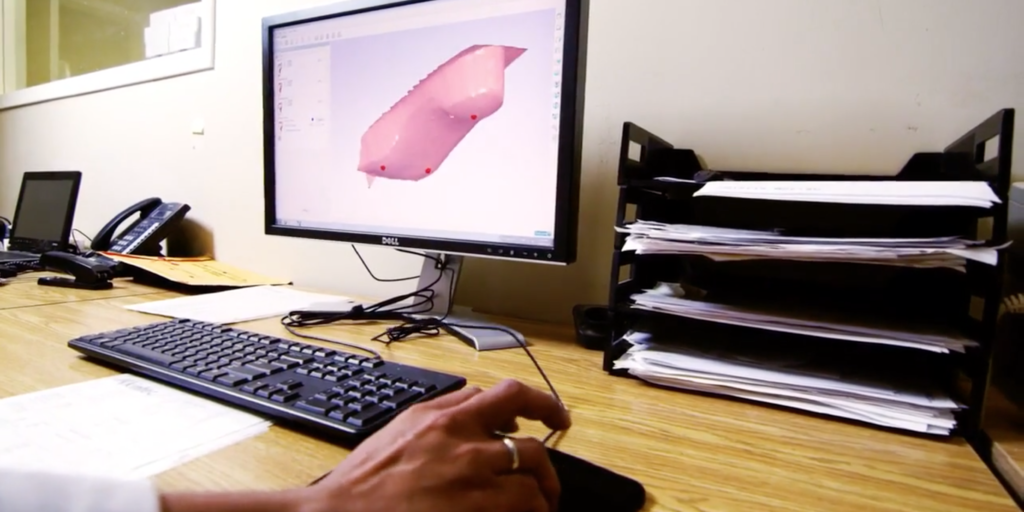
Step 2: Processing
From here the foot scan or mold is sent to our lab in Surrey, BC.
We send the foot scan digitally, and one of our lab technicians processes it using advanced CAD software designed specifically for foot orthotics. The processing essentially smoothes out the scan, removing any lumps or bumps that would, in turn, make the orthotic uncomfortable.
If a physical mold is sent, then it is scanned and processed the same way. In the past, this process is done by hand-carving plaster-of-Paris molds of the feet. As CAD software has improved, though, it has far surpassed the quality and reliability of the plaster methods.
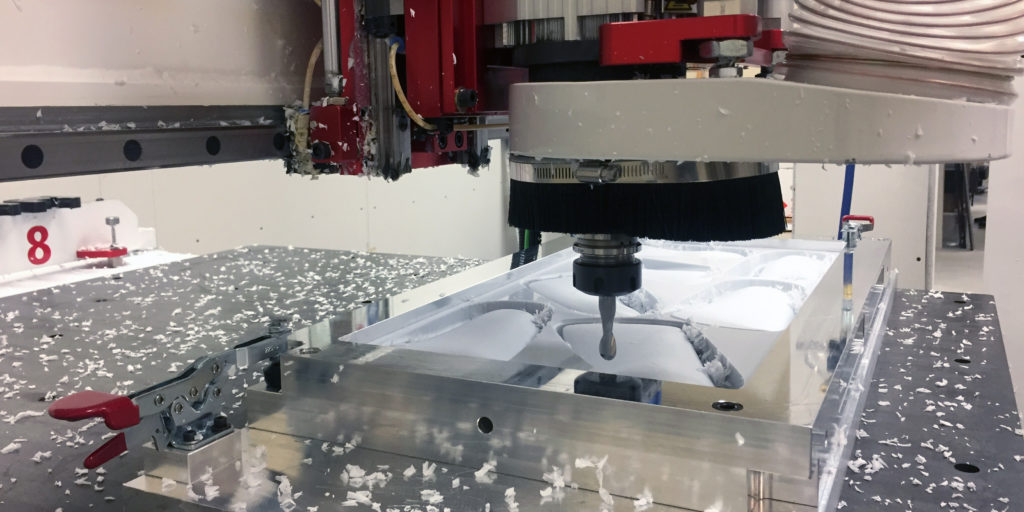
Step 3: Milling
Once we process the foot scan, we send it to one of our milling machines.
For polypropylene orthotics, a CNC milling machine cuts the complex shape of the orthotics directly from a block of the sturdy, white plastic. By milling directly, we can ensure a precise thickness of the shell and create the shape of the orthotic with as little error as possible.
For materials other than polypropylene, the CNC milling machine cuts the same shape into a block of rigid foam to create a mold. The orthotic material is then heated, and vacuum pressed around the foot mold. We use this method for materials such as graphite, a few semi-rigid plastics, and various firm and soft foams.
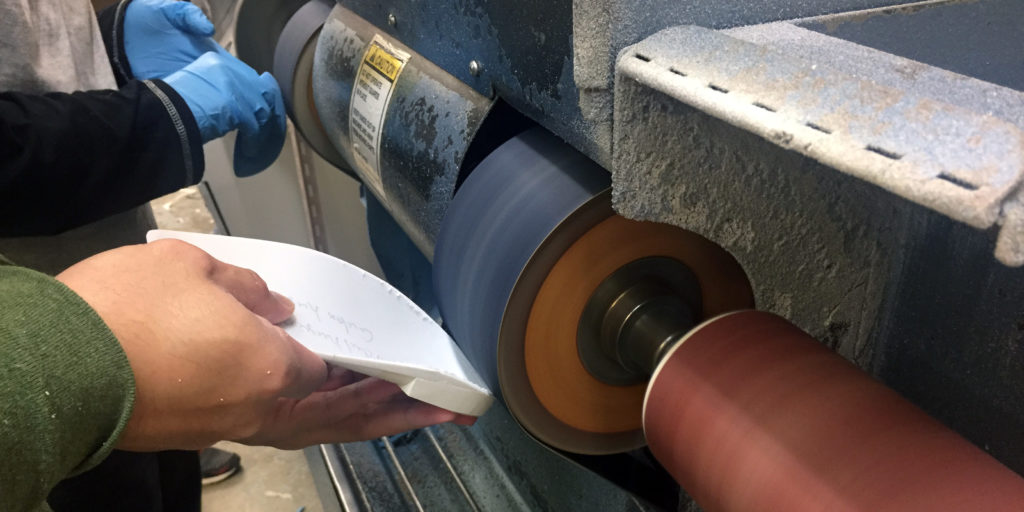
Step 4: Grinding
We now fine-tune the shell!
If the pedorthist has ordered a slimmer shell, or smaller style, to accommodate their patients’ footwear, then they may need to further shape the shell by hand.
As well, any soft material additions are now ground and added by hand. These additions may include metatarsal supports, heel cushion, or sweet spots.
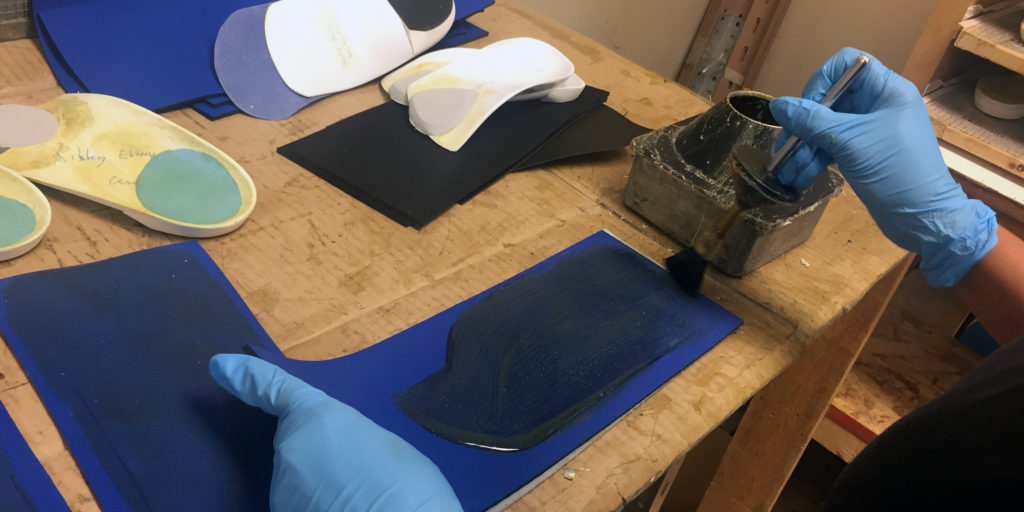
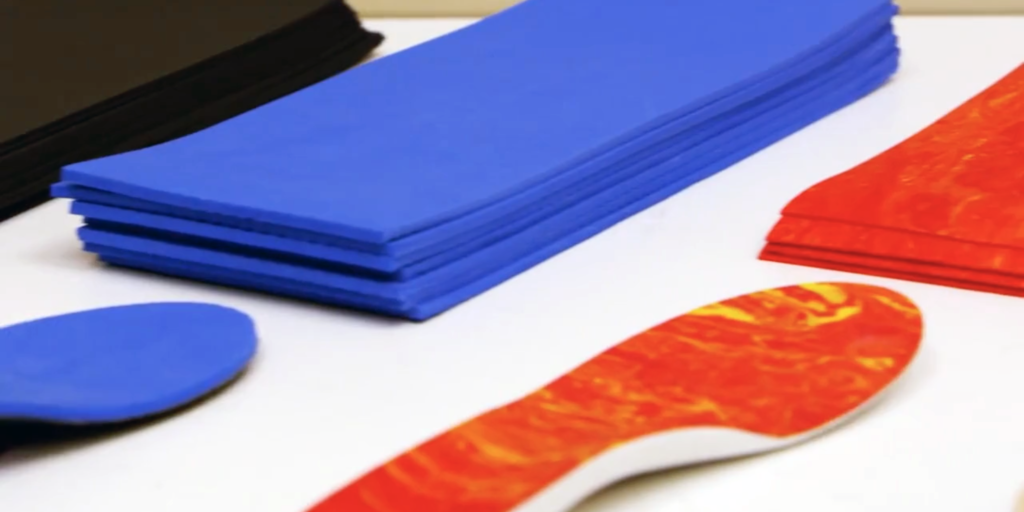
Step 5: Finishing
Now, we’re ready to cover the orthotic.
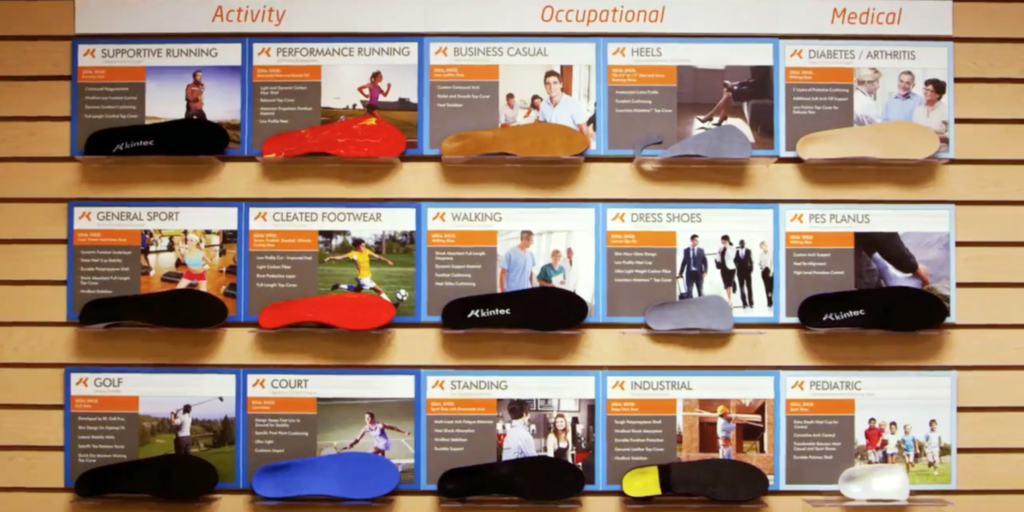
With over 20 different topcover types, the pedorthist and our lab technicians will ensure you get the material that suits your feet, your shoes the orthotic, and the activities the orthotic is meant for.
The topcover protects the support features of your orthotics and provides a comfortable surface for your foot to make contact with.
Step 6: Fitting
At your orthotic fitting, your pedorthist will ensure the orthotic fits your foot as well as appropriate footwear and works to correct or control the foot the way we want it to.
Our in-clinic mini-labs are available should we need to fine-tune or adjust from here.
Kristin Ohm-Pedersen, BHK, C. Ped (C)
Kintec Pedorthist
Want to learn more about how orthotics can help in your daily routine? Read more of Kintec’s articles related to orthotics!
Wes B.
May 29, 2020 at 2:15 pmHi, my lovely wife is a chef and is on her feet 12hrs a day 5-6 days a week. When she comes home it’s nothing but foot pain and limping. I would like help her, in her quest for great foot support
Please contact us at your earliest convenience. Wes.
Michael Ryan - Director of R&D
June 8, 2020 at 10:10 amHi Wes, thanks for your comment. Completely understand the rigours of working as a chef and prolonged standing. Why don’t you have your wife book a free 15-min phone consult to have us find out more info on how we can help: https://kintec.net/appointment-booking/. Thanks!